

New Light House Design
Posted February 2015
My Design Process
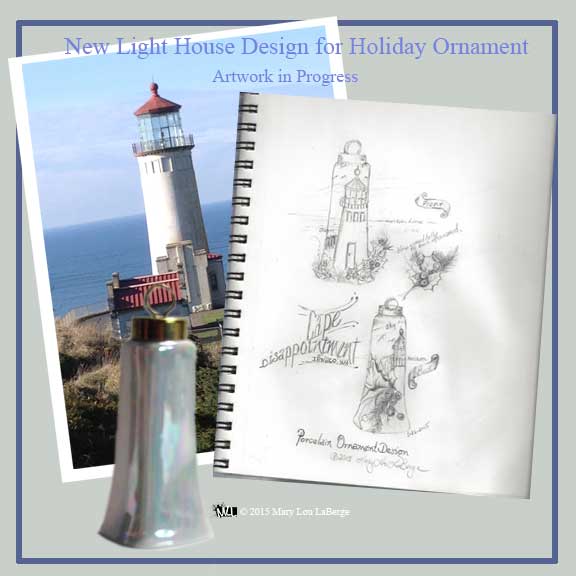
What? Holiday painting in February? I am working on a new design for tall bell ornaments. I love how beautiful this tall and elegant shape looks when decorated with a landscape painting. In the past I have painted snow scenes on these tall porcelain bells. For a change, I decided to try painting a holiday light house. As a reference, I used a photograph of the North Head light house taken at Illwaco, Washington a couple years ago on one of our beach trips. This photograph was taken on a rare and beautiful cold day during winter. Since the ornament is only four inches tall, the light house will be a simplified version of the original photograph and much of the external detail is omitted resulting in a style that is leaning toward a more whimsical design that will be easy to see on such a small surface.
This is a sample layout of my design process. I start with a photograph and a product shape, such as the tall bell and then start drawing rough layouts and images with a mechanical pencil in a spiral bound notebook. The notebook serves as a journal of designs that may or may not see the light of day. The purpose of drawing is to get ideas in my mind onto paper. As I work my way through the process, the instructions are written down and photographs are taken of the artwork in progress. Sometimes these are used for online instructions and sometimes they are used as personal references when I need to remember a color combination that I used during the painting process.
Fine Tuning the Design
Posted March 2015
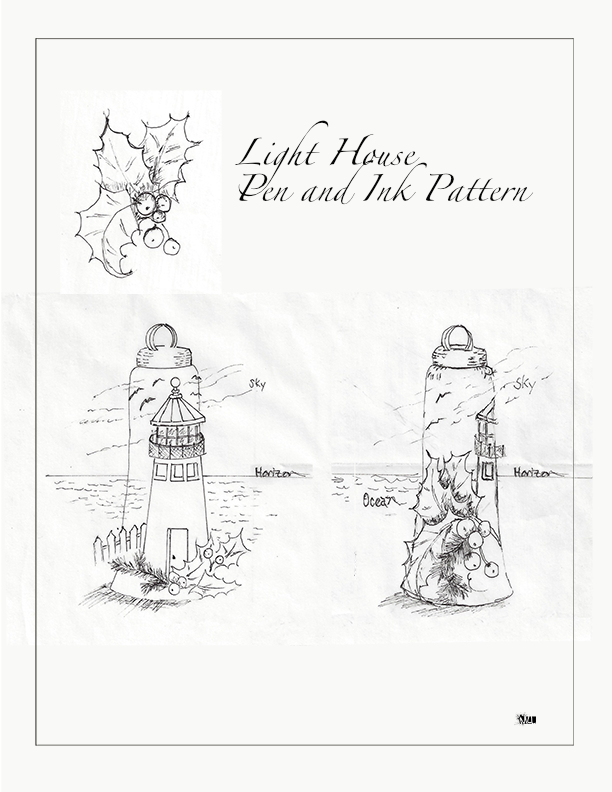
After sketching ideas, I usually begin developing a pattern that will transfer to the three dimensional object intended for painting. At this stage, it is time to figure out what works and what doesn’t fit neatly into the design. In this case I have experimented with rough layouts and refined the perspective. It seemed like a good idea to sketch a filler design just in case the light house could use some imagery to fill in some of the negative space which is why I drew the holly and berries. Once in awhile, those little extra’s come in handy later.I am thinking maybe this design is now ready to transfer onto a porcelain bell shaped ornament.
Here in the art studio I am taking photographs and writing the full set of step by step painting instructions for this project and they will be posted on the Learn pages of this website, however, for the time being, I am sharing how I designed this project here on the blog.
Paint and Write and Photograph the Lesson
Posted May 2015
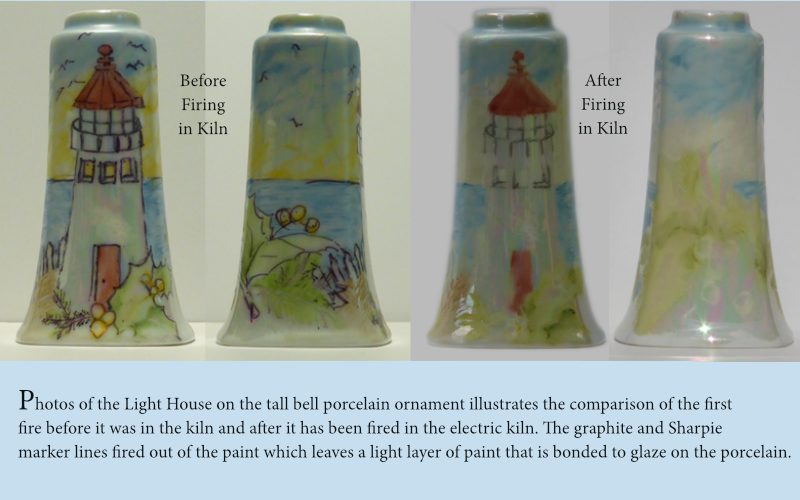
Each step by step article takes a fair amount of experimenting, writing and photography. As the painting progresses, some techniques are kept and some are trashed. As the steps are completed, an entry is made in a journal documenting what works and what doesn’t during the painting process. For instance, if I am working on the sky, I write down the color or colors used for the sky and make a note of the tools used and sometimes write about how I feel about the current stage of the painting. I continue writing as the painting progresses until a full set of instructions for each stage is completed. Also, during these painting sessions, I take photographs of each step. If the weather permits, the photograph is taken outdoors because I like the results of outdoor photography. If the weather isn’t ideal, the photographs are taken indoors with the aid of a photo tent. Photo tents help with light and shadow areas of glass and porcelain. My tent is home made just because I wanted to learn how to make a photo tent. For the light house ornament, there were eighty digital photos documenting the painting process as the first fire painting session progressed. By the time a painting is finished, there might be over 500 photographs documenting the process. Thankfully, we have access to digital cameras. The photos are archived in three places to ensure that they will be available if any of the technology fails while constructing a lesson. Organizing the online lesson usually begins with photo editing software that aids in organizing the images into a step by step photograph such as the before and after photograph above. After the photos are organized, I use the notes in the painting journal to write lessons using html code. The photos and html code are uploaded onto a server so that your browser will access the china and glass painting instructions. I enjoy documenting the painting process and sharing the results with others.
Most artists have a creative process that works best for their style. This blog post series is a visual narrative of how I like to create artwork. What is your creative process?