

Gather your Supplies
|
|
THE PLAN
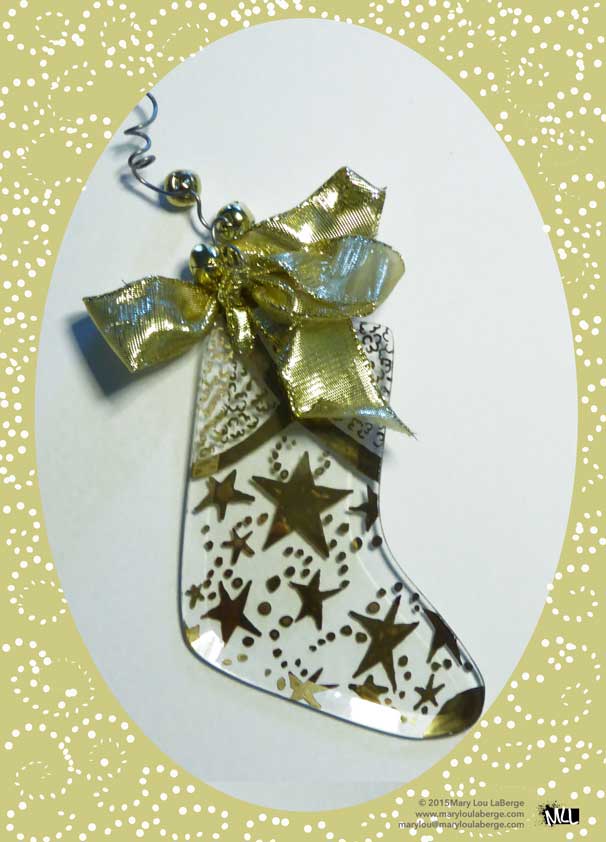
Simplicity was the goal for this painting. There are so many options for painting this glass piece, however, when it comes to the increased pace of life during the holidays it seemed like a good idea to design an ornament that could be finished in one firing session using an electric kiln.
Use clean brushes and keep your luster brushes separate from your other painting brushes. I don’t use mineral oil on luster brushes. In my experience, the mineral oil causes the liquid bright gold to disperse when firing. Instead, clean your brushes with denatured alcohol or mineral spirits.
PREPARATION
Clean the glass with an purchased glass cleaner, or denatured alcohol or a vinegar water mixture or dish detergent that removes grease. Wipe dry with a lint free cloth.
DESIGN
I like to draw or print my designs on tracing paper. Trace around the ornament with a graphite pencil or pen. Then freehand draw your design over the traced boot shape or copy the design above.
After you have finished your design, place it underneath the glass boot and secure with a small piece of tape. You will be able to see the design through the glass.
HAVE FUN PAINTING
If you Need a Second Fire
If for some reason the Liquid Bright Gold on your design needs to be filled in or repaired because an area was missed or painted too light, it can be painted again with additional Liquid Bright Gold and fired a second time in the electric kiln.
Firing your Design
Since this is pre-formed glass, fire no hotter than cone 022. which is between 1050-1080 degrees Fahrenheit. Also, the kiln shelf must be coated with ceramic or glass kiln wash. I place the glass directly on the kiln shelf without kiln furniture or fibre paper because at the suggested temperature it won’t stick to the kiln shelf if it's coated with kiln wash.